


Getting Started
This tutorial shows how a developer application gets verified on the High Mobility platform and how the data eventually is retrieved via the Auto API from customer’s car. The High Mobility platform is built on openness - anyone can register an account, start building prototypes with simulated cars and eventually launch a service to the public via the Production Mode. We’ll show you here exactly how.
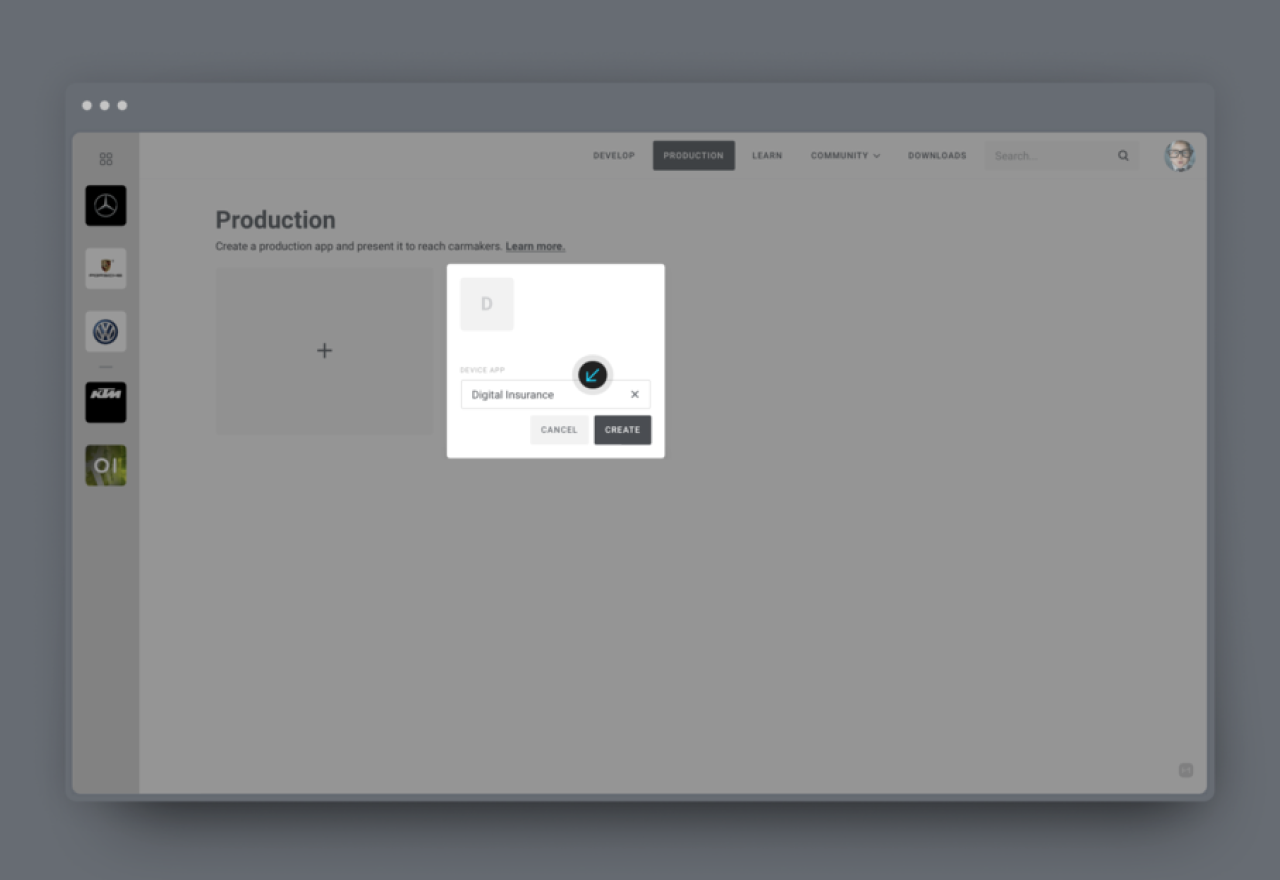
Step 1: Create a new Production project
For simplicity we assume in this example that a developer has already tested the prototype with car simulators in the Develop Mode, and is now ready to create a production version. By that point the developer is well aware of the data points that will be required for the application to work. Here we will use an example of a build of an innovative insurance service using the mileage data point.
We start by navigating to the Production tab and creating a new project:
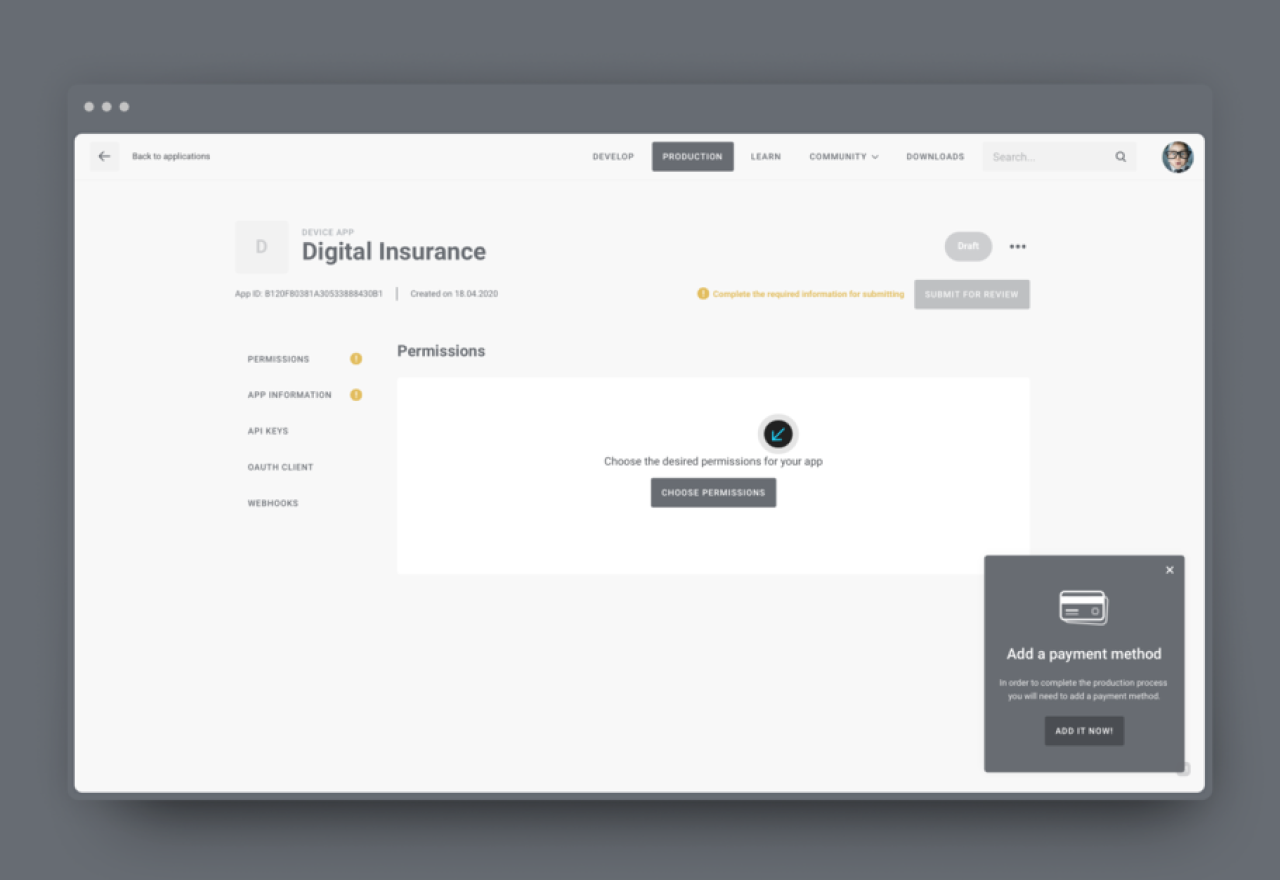
Step 2: Selecting permissions
Once we hit “Create” we will be directed to the application view. Notice that it is slightly different what we have seen in the Develop Mode. Missing are the car emulators and other tools we have used to test our application.
The first thing we need to do on this screen is to start selecting the permissions for our application:
Selecting “Choose permissions” will fill the screen with a long list of permissions. To make it easier for developers to select only the permissions that are currently available from the cars we have bundled some of them into use case specific bundles:

Since in this example we have been building an innovative insurance application and the data point we are interested in is “mileage”, let’s see if there is a bundle for us:
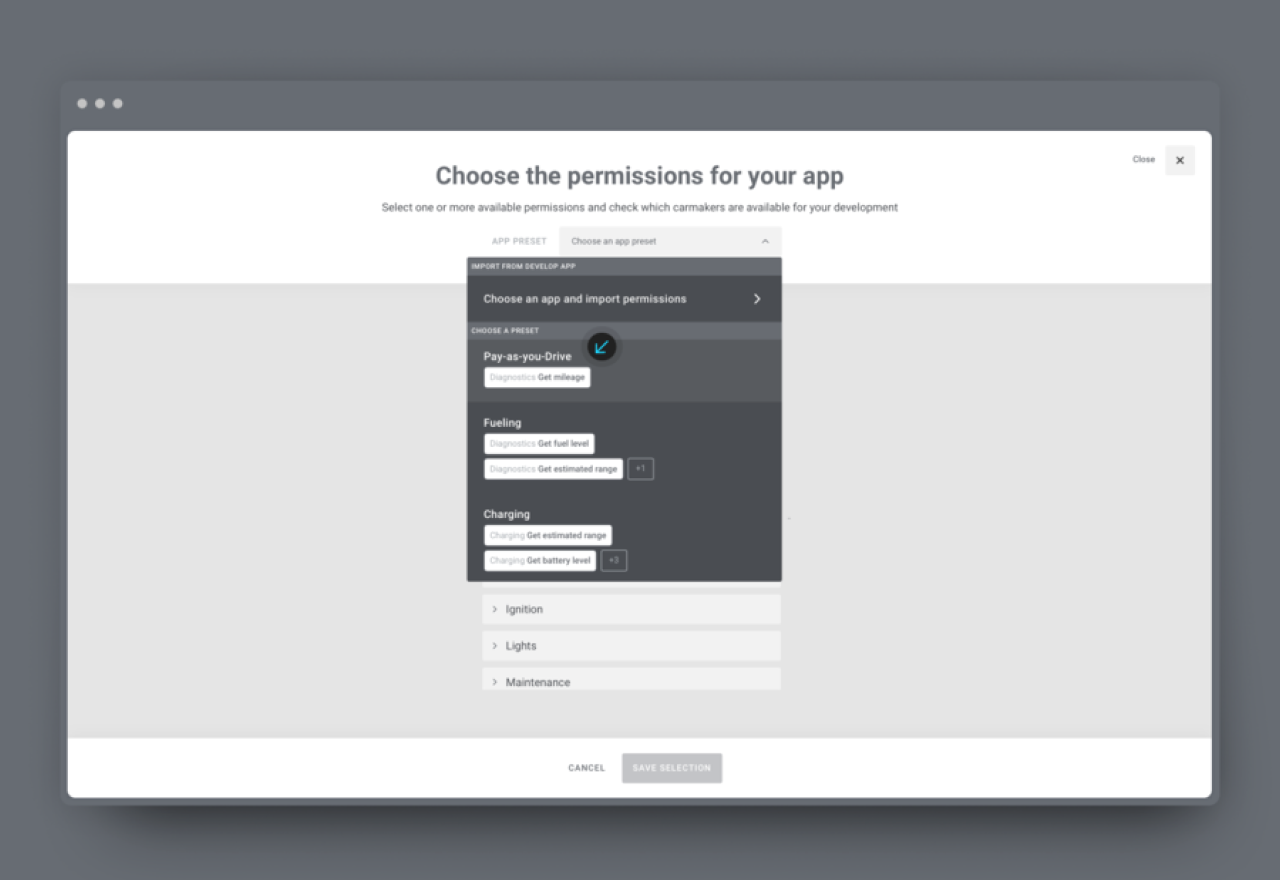
Yes, there appears to be a preset called “Pay-as-you-drive” which is exactly what we need. We will select this preset and the High Mobility platform shows us right away which vehicles support “mileage” permission, what are the prices for a monthly cycle per car and other data terms we should be aware of:
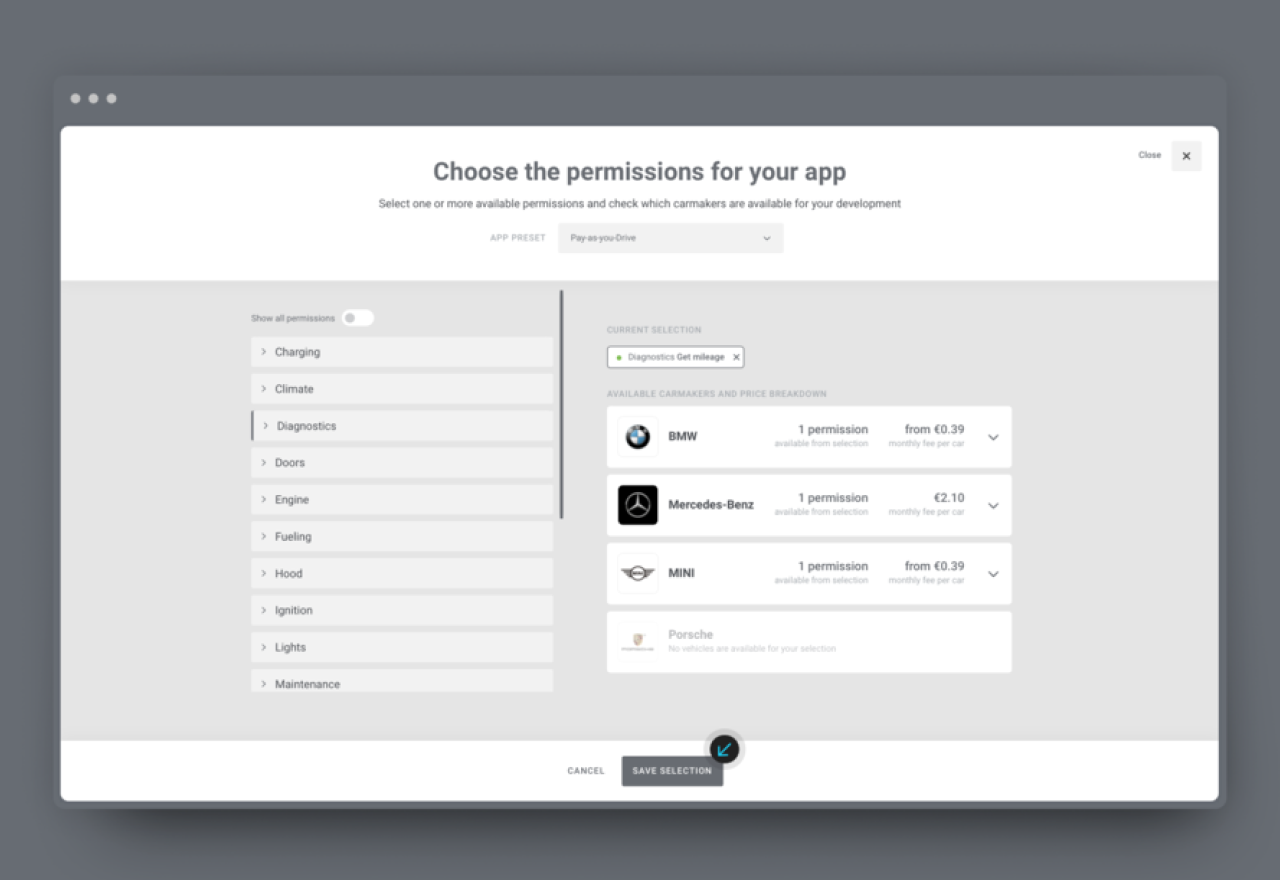
Satisfied with the information and assuring there is a little green marker next to “Diagnostics: Get mileage” permission we are confident that our application would be able to function with the API integration. Our customers driving BMW, Mercedes-Benz or MINI vehicles will be able to connect their applications with their cars.
Step 3: Filling in the application information
Once permissions have been selected, it is necessary to provide some basic information about the app, including a description, terms and conditions, a privacy policy, and a link to the app. It is also necessary to enter payment information before accessing live car data through the Auto API. Once an app has been submitted for production, High Mobility needs to review it and confirm that it conforms to the guidelines passed down from the car manufacturers.

Step 4: Changing OAuth Credentials
Now the real power of the High Mobility platform comes into play. In order for the application to eventually connect to real vehicles the OAuth parameters need to be changed. We need to point them toward the production servers, rather than to the vehicle emulators. In the High Mobility platform as soon as a production app project is created, even when it’s still a draft, the OAuth credentials are available and usable before submitting the app for review.
So, before submitting the application we have to change these parameters in our app.

This allows the verification team at High Mobility to test the app with a special purpose “verification emulator”. Once the app is approved by the team, the app credentials are released for the production environment and are ready to be used. When the app calls the Auto API using these new credentials, the data provided in the response will correspond to an actual car.
Here’s how a response will look like:

Step 5: Webhooks
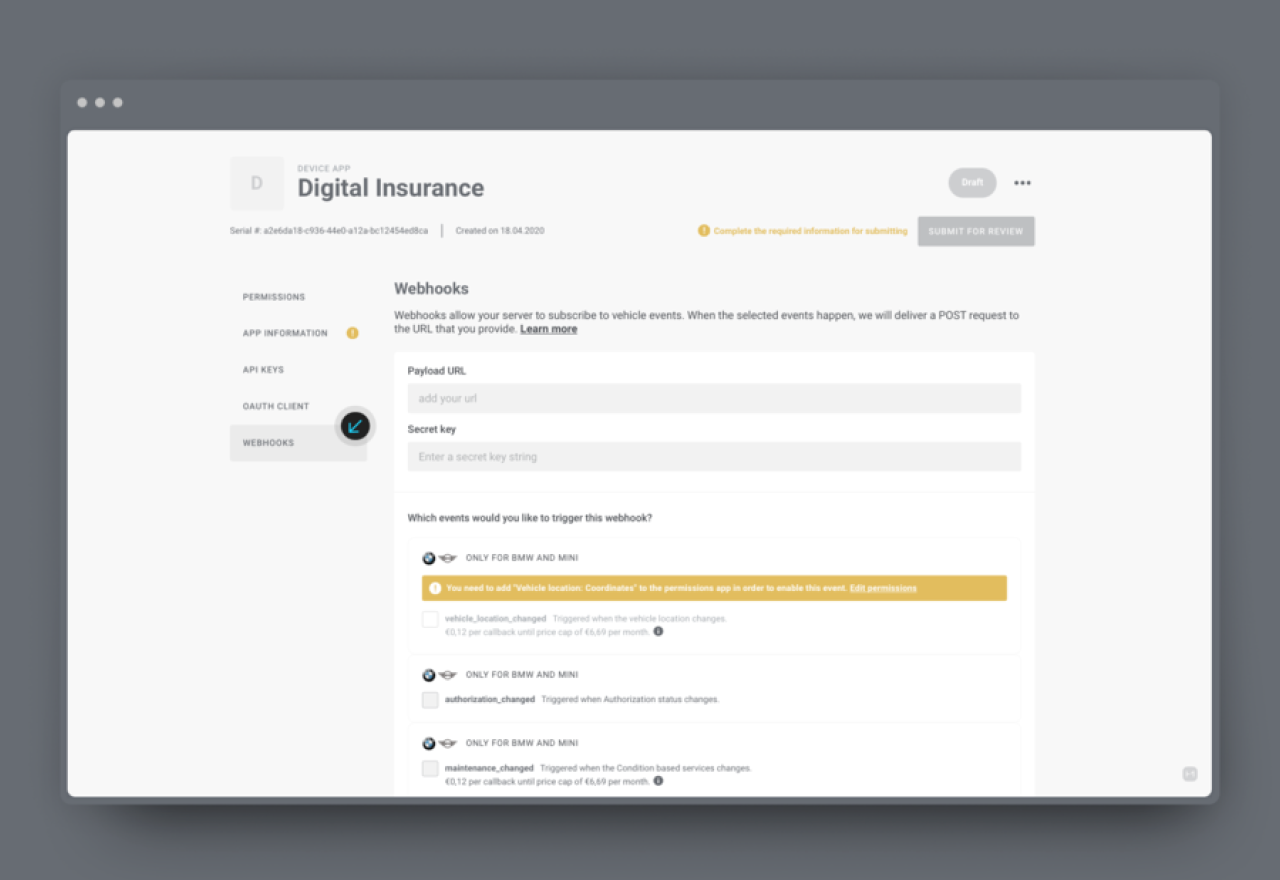
Some car manufacturers are already offering webhooks. Webhooks allow your app to subscribe to different vehicle events and act on it. Once configured, the webhook will be triggered based on different vehicle events. This makes app implementations simpler, as it is no longer necessary to poll the Auto API in order to determine when states change.
Step 6: Submitting the application

Now we have selected the required permissions, configure OAuth credentials and filled in our company as well as our application information. We are ready to submit the app for a review.
Step 7: Final Review
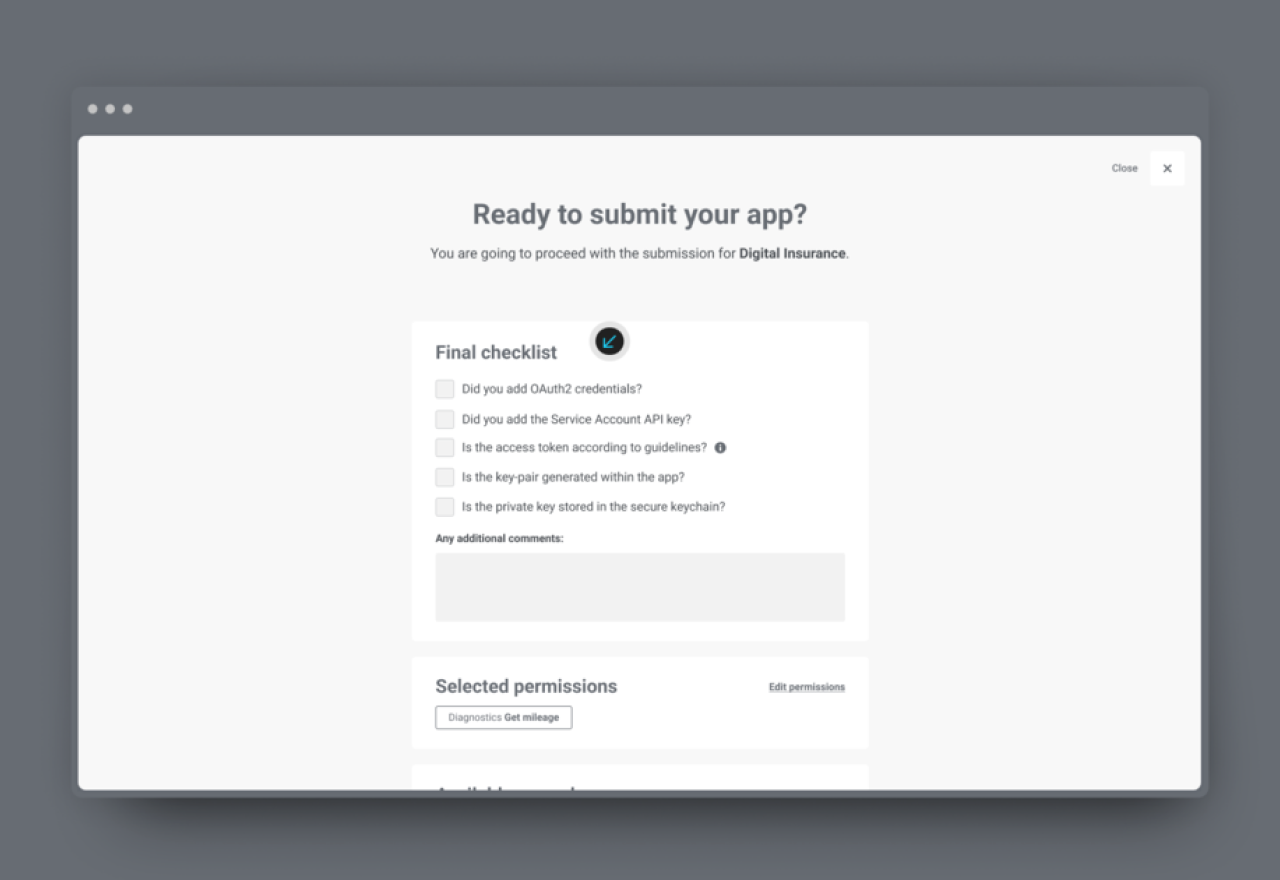
This final screen provides us with a handy checklist - just as a reminder to ensure smooth process. It will also list the permissions selected, the payment method and data prices. We will not be charged anything at this point - only after the application is approved and our first customers have connected the service with their vehicles.
That’s how easy it was. With the Auto API and High Mobility platform, accessing car data from multiple car manufacturers has never been simpler. With a single integration, it is now possible to access data from BMW, MINI, and Mercedes-Benz vehicles — with more manufacturers coming soon.
